How can we help?
DIY Setup Step 2 ~ Tame The Overwhelm
Even if you’re the only team member in your business, you’ll need a “user” account for yourself so you can accurately configure things like your calendar availability, email signature, and more.
And, because Fern CRM is designed to grow as your business grows, this sets you up for an easier transition when you do hire team members and give them their own login to your CRM account.
But after onboarding over 100 businesses to this tool (HighLevel and Fern CRM) one of my favorite ways to use your user accounts is to tame the overwhelm of seeing ALL the features and trying to learn your way around your new dashboard. It’s easy to get lost in the sea of features when you’re trying to find the one thing you’re interested in right now.
So let’s tackle all of this and more with a few easy steps.
User Accounts In Fern CRM
Every CRM plan comes with at least 2 user accounts. Your plan comes with unlimited user accounts unless you downgrade to the Leaf (formerly “Sprout”) plan which is limited to 2 user accounts.
The Leaf plan is limited to 2 logins because it’s designed to be as affordable as possible for beginner businesses, as well as a cheaper way for established businesses to build their vision before adding contacts.
Step 1 ~ Go to “My Profile” in the Settings side
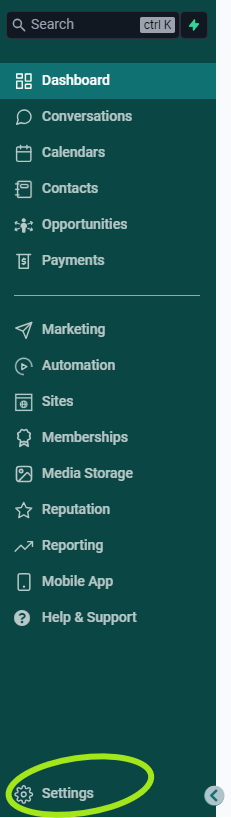
Once again, start in the “Settings” side of your Fern CRM account. If you’re in the “main” side, then find the Settings link at the bottom of the left sidebar:
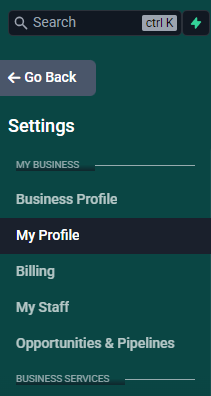
Look for the “My Profile” link in the left sidebar and click it to open your user profile settings.
Step 2 ~ Update Your Admin User Account
The “My Profile” page looks something like this:

This is your information as the account owner, the one you’re currently logged in as.
The minimum needed to add a user is First Name, Last Name, and Email.
Name
If needed, update your name to whatever you’re comfortable with having others see. For example, the name your audience knows you as. Not your business or brand (unless it also uses your name.) Your business has its own profile (which you filled out as part of step 1 if you’re following the DIY Setup Steps.)
For now, this will be the same email you use to log into your Fern CRM account. We’ll change it later when we create your email engine so just make sure it doesn’t have any typos or anything. (If it does, email us because it will cause problems later if we don’t do a thing on our end as well!)
Phone
Add any phone number you want that can get text messages. You can use your business phone number, Google Voice number, or you can wait until your Account Setup Session and we’ll help you get a business phone number to use here.
It’s important that the phone number you use here can receive text messages so you can use it as-needed to receive verification codes when logging in.
Profile Image
I think the only people who ever see this image of you are you and anyone else who logs into your user accounts (in other words, your team members if you give them a user account.) The image you upload here will be the image that’s displayed in the top right corner of your Fern CRM account.
Email Signature
You can leave this blank for now (because we’ll come back to it later.) If you have an email signature you like to use when engaging with leads, clients, customers, or peers, go ahead and add it here.
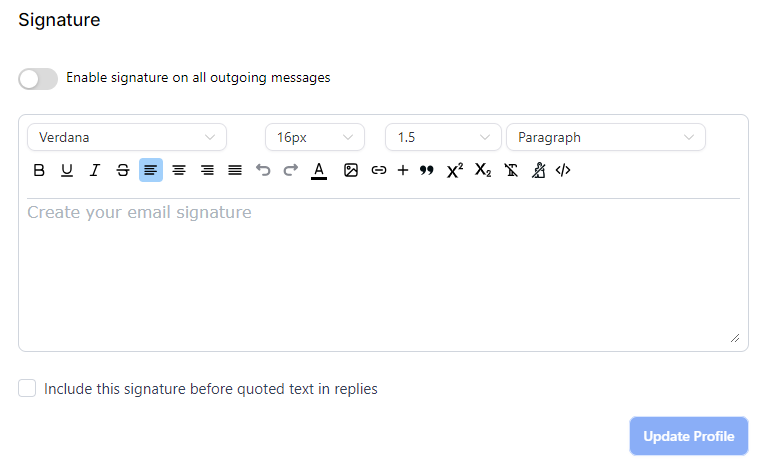
When you’re ready, click the “Update Profile” button which will show up as bright blue once you’ve filled out the minimum requirements. Make sure to click this button when you’re done, this is the official Save button for the name, email, etc. fields.
Step 3 ~ Tame The Overwhelm
In the left sidebar, click on [My Staff]

It will open a page like this:
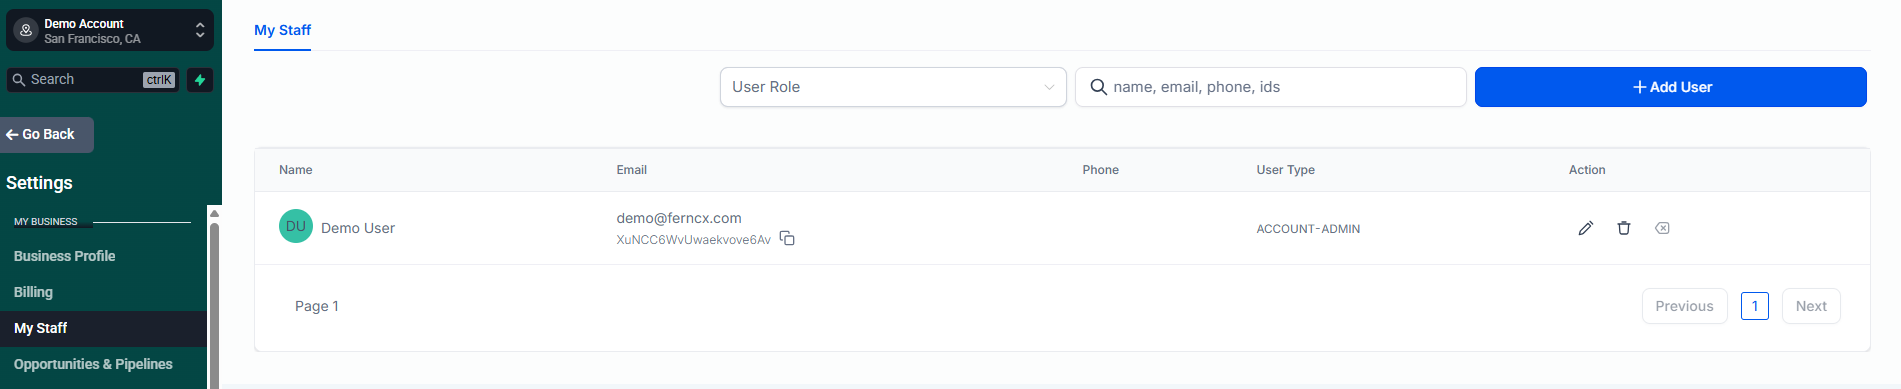
This page shows a list of all the users who can log into your Fern CRM account. Right now, it probably only shows you.
Look to the far right under the column labeled “Action” and click on the pencil icon. (The pencil icon’s alt text/aria label is “Edit”.)
This will open your user profile with a new menu of options, including “Roles & Permissions.”
Roles & Permissions
When you’re ready, click on the “Roles & Permissions” link in the left menu (not the left sidebar, just the list of links that’s to the left.)
Where it says “User Role” keep it as an admin role for yourself. When it’s time to add team members, you’ll likely give them a user role to limit what they can do inside your account.

Ok, this is where we’re going to get clever and hide as many features as you want until you’re ready to see them/learn them/use them. This will make navigating your CRM account so much easier and calmer.
If you don’t want to hide any features and “tame the overwhelm” then click here to jump to the steps for being able to see/use everything: Show Me Everything!
Go through the list of permissions and uncheck any you don’t want to see/learn/use right now. (You can always come back here and turn them back on, so go crazy!)
We recommend turning off EVERYTHING except for a few features. Get super comfy with those few features first, then come back here when you’re ready to add new ones.
To begin:
- Click the toggle switch to turn off AI Agents. (Plenty of time to play with those later!)
You can scroll down to get to the next set of features/toggle switches (you don’t have to click on the options in the left menu every time.)
And you can wait until you’re finished to click the [Save] button.
Next, toggle everything off EXCEPT the following:
- Account settings
- Contacts
- Conversations
- Funnels
- Integrations
- Subaccounts
- Under “Marketing” uncheck everything except for “View & manage social planner”
- Medias
- User Management
When you’re done making your selections, click the blue “Save” button at the bottom of the list.
Skip to this section to continue: Additional Settings
If You Don’t Want To Tame Your Account
Here’s what you need to know if you’re choosing to keep your visibility and access to everything:
A few notes about specific permissions:
- Under “Automation,” the options for “View campaigns” and “View workflows” is shaded out by default and not clickable if “View and manage campaigns/workflows” is clicked on. In other words you can either choose view-only or view-and-manage, not both.
- It says “Launchpad” in the left menu, but there are no permissions for it. (It’s an annoying feature that we removed from all Fern CRM accounts after numerous requests.)
- Under “Dashboard,” check the box for “View attribution” to turn it on (if it’s turned off by default.)
Everything else should already be selected, so you’re good to go!
If you made any changes, the Save button in the bottom right will become bright blue and be clickable. Click Save to save your changes.
Additional Settings
You don’t need to fill out anything in the following sections until later when you’re setting up your phone integrations and/or calendars. We’ll tackle those sections when it’s time:
- Call & Voicemail Settings
- User Availability
- Calendar Configuration
Notifications
Go ahead and review the notifications and check/uncheck as you prefer. If there’s anything in that section you aren’t sure about, make a note and we can discuss it during your Account Setup Session (or just email us!)
That’s it!
Once you save, it will bring you back to the “My Staff” page.
Now, when you look at your sidebar menu on both the MAIN side and the SETTINGS side, you’ll see way less things and be able to find your way around more easily.
Congrats! Enjoy your new streamlined Fern CRM experience!
If you want to add a team member right away, here’s how. Otherwise, you’re done here!
Optional ~ Add Team Members
From the Settings side of your account, click on “My Staff” in the left sidebar.
You’ll see yourself in the list of staff members:
Click on the big blue button that says “+Add Employee” to get to the new user profile settings:

A page like this will open up, just like the page you saw when editing your own profile, but blank:
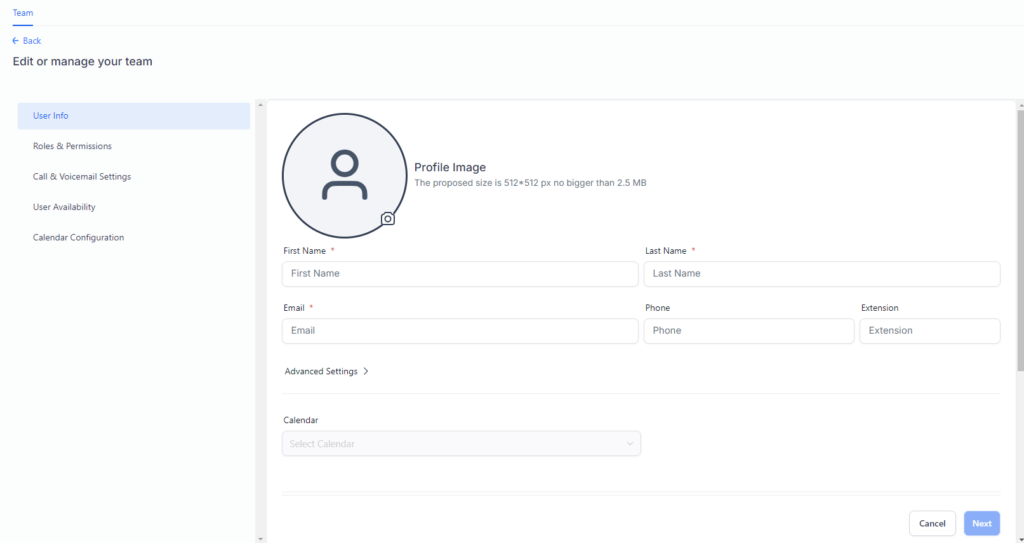
The bare minimum you need to fill out for your team member is name, email, password, and Roles & Permissions. They can do the rest when they log in themselves.
Password
Click on “Advanced Settings >” under the email field to open a submenu where you can create the password for this user. This is the password they’ll use to log into your Fern CRM account on a regular basis, but they can change it at any time. (If you leave this blank, they’ll just have to do a “forgot password” routine to log in the first time.)
section.
Roles & Permissions
Follow the same steps as above to toggle off the things you don’t want this team member to have access to. When they log in, the sidebar they see and the sections they have access to will only show the things that they’ve been given permission to see.
When you’re done, click the [Save] button at the bottom right and you’ll see your team member in the list of users in “My Staff”.
Remember ~ if you create more than 2 user accounts (including your own), you can’t downgrade to the cheaper CRM plan until you delete the additional users.
I can’t seem to find the:
Roles and Permissions
space to “tame the overwhelm.” Has that moved?
If you go to the “Settings” side of your Fern CRM dashboard, then click on “My Staff,” you’ll see the list of users who have access to your account – yours and any team members you’ve added.
Click on the pencil icon next to any user to edit their profile. Once you’ve clicked on the pencil, it will open the settings for that specific user. That view will include a list of options on the left side that includes “Roles & Permissions” and matches the screenshot in this post.
Let us know if you still can’t see it or access it!