How can we help?
How To Set Up Your Dedicated Email Domain [Tech Steps]
Fern CRM is one of the best tools for landing emails in the inbox I’ve ever seen. But it only works if it’s set up correctly.
There’s one prep step before this process ~ pick a subdomain for your email engine to operate on. In a nutshell, it can be any subdomain on your website’s domain that isn’t used for anything else. Here are the rules:
- Can’t be your root domain
- Can’t be a domain you’re using for anything else
- Can’t be “mail” or “email”
If you want to know why you need an email engine on a subdomain instead of just using the @yourdomain.com you use with gmail or whatever, read this article:
Dedicated Email Domain Strategy
Otherwise, just pick a word to go in front of your root domain and proceed:
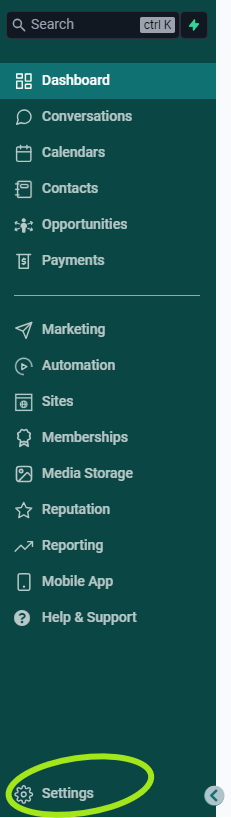
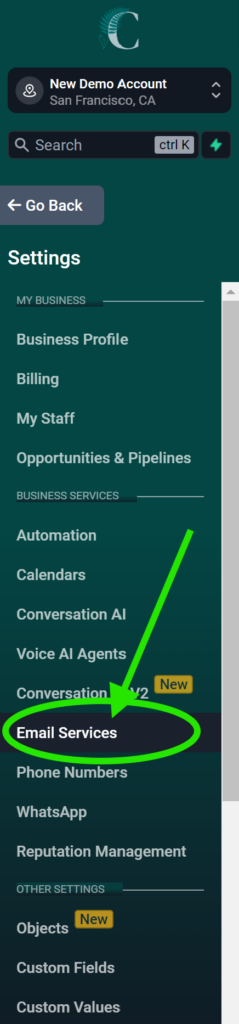
Step 1 ~ Open your Fern CRM Email Settings
Go to the Settings side of your dashboard and choose “Email Services” in the left sidebar:
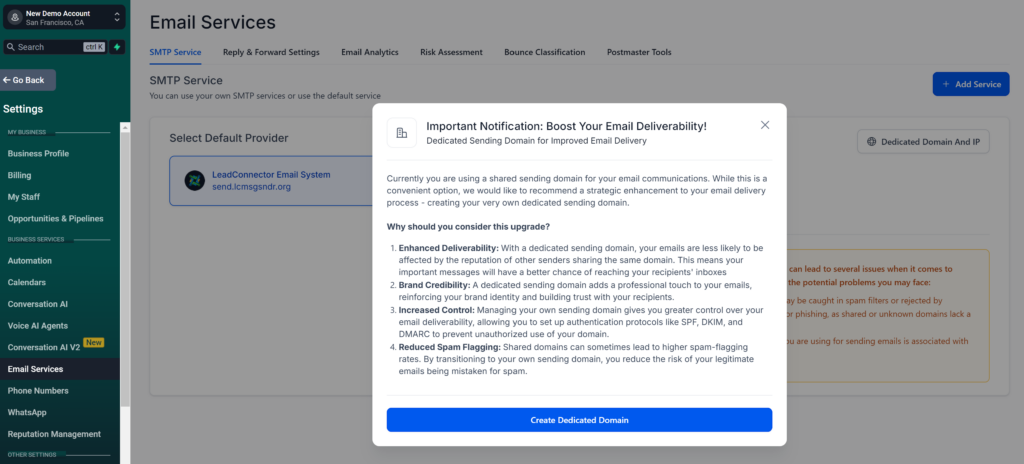
Once you’re on the Email Services page, you’ll see an overlay box like this if you haven’t already set up a dedicated email domain:
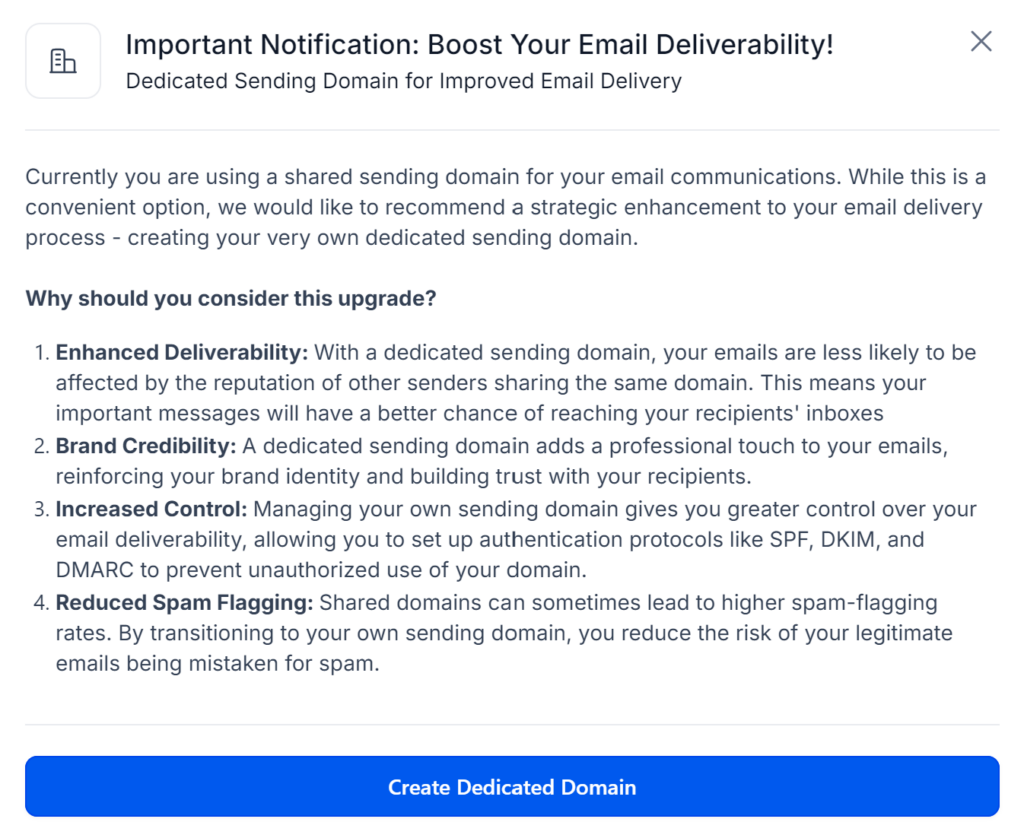
A closer view of that benefits box:
Step 2 ~ Enter your email subdomain
When you’re ready, click the big blue button that says “Create Dedicated Domain” which will open a page that looks like this:
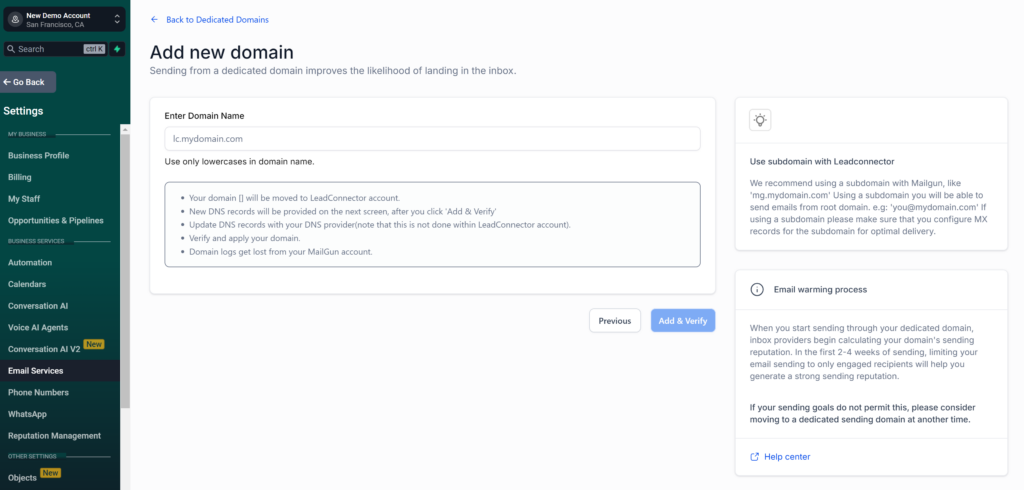
The box directly below the title “Enter Domain Name” is editable. That’s where you want to enter the subdomain you chose for your email engine. As the example text shows, enter your subdomain in this format:
yourword.yourdomain.com
Do not enter any kind of http or https prefix, just the word, period, your root domain without any spaces.
Once you’ve filled out that box, the blue button that says “Add & Verify” will change from a light blue to a bright blue and be clickable.
When you’re ready, click the Add & Verify button to continue.
Step 3 ~ Open Your DNS Settings
Once you click the Add & Verify button, it will open a new box that looks like this:
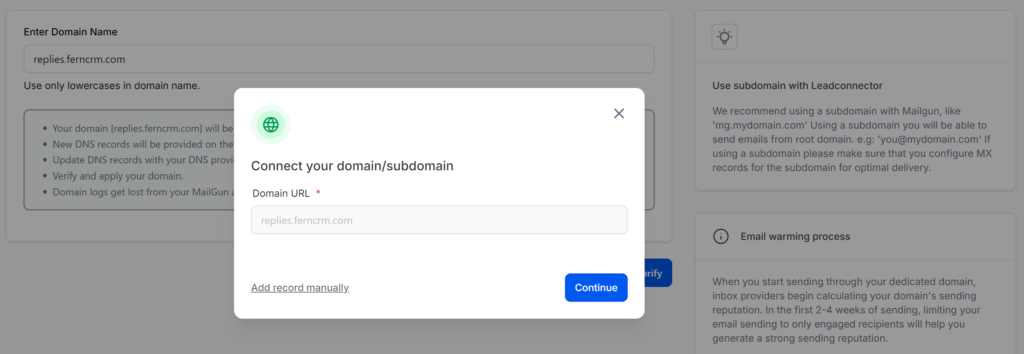
You should see the same subdomain you entered on the previous page in the shaded out box under the title “Domain URL”.
We recommend clicking the link in the bottom left to “Add record manually” if you already know where your DNS records are located and editable.
If you aren’t sure where your DNS records are housed (or you’re not sure what a DNS record even is) click the blue “Continue” button to find out. The wizard will do a quick scan and then show you where it thinks your DNS records are located. At that point, you can choose to manually add them or give permission to the wizard to do it on your behalf.
Cloudflare
We recommend using a free Cloudflare account for accessing and editing your DNS records (when possible.)
No need to pause what you’re doing now, but maybe bookmark this Help Doc for later and think about opening a free Cloudflare account: When, Why, How To Use Cloudflare For Your DNS Records
If you click “Continue” to run the wizard
Clicking the blue “Continue” button in the bottom right of the window shown above will start a quick scan and then (usually) will show a window like this at the end that names the tool where your DNS records are edited:
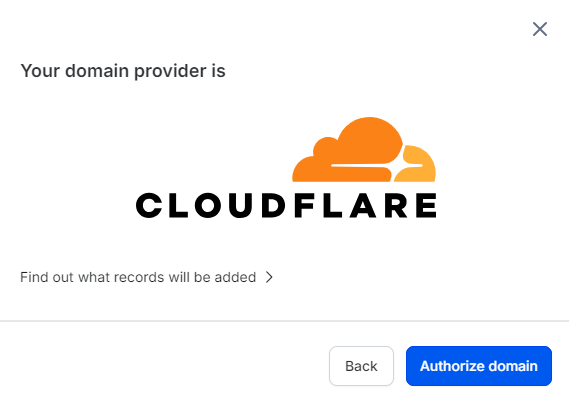
Clicking on the blue button that says “Authorize domain” will give the wizard permission to connect to the tool shown on your behalf so it can add the records to your account. If you don’t wish to give this permission, click the Back button.
If you choose “Add record manually”
Whether you used the wizard to find out where your DNS records are housed and then hit the Back button or you skipped that and went straight to adding the records manually, continue to step 4.
Step 4 ~ Add Email Records
Once you’ve clicked the link to “Add record manually” you’ll see a pop up window like this:
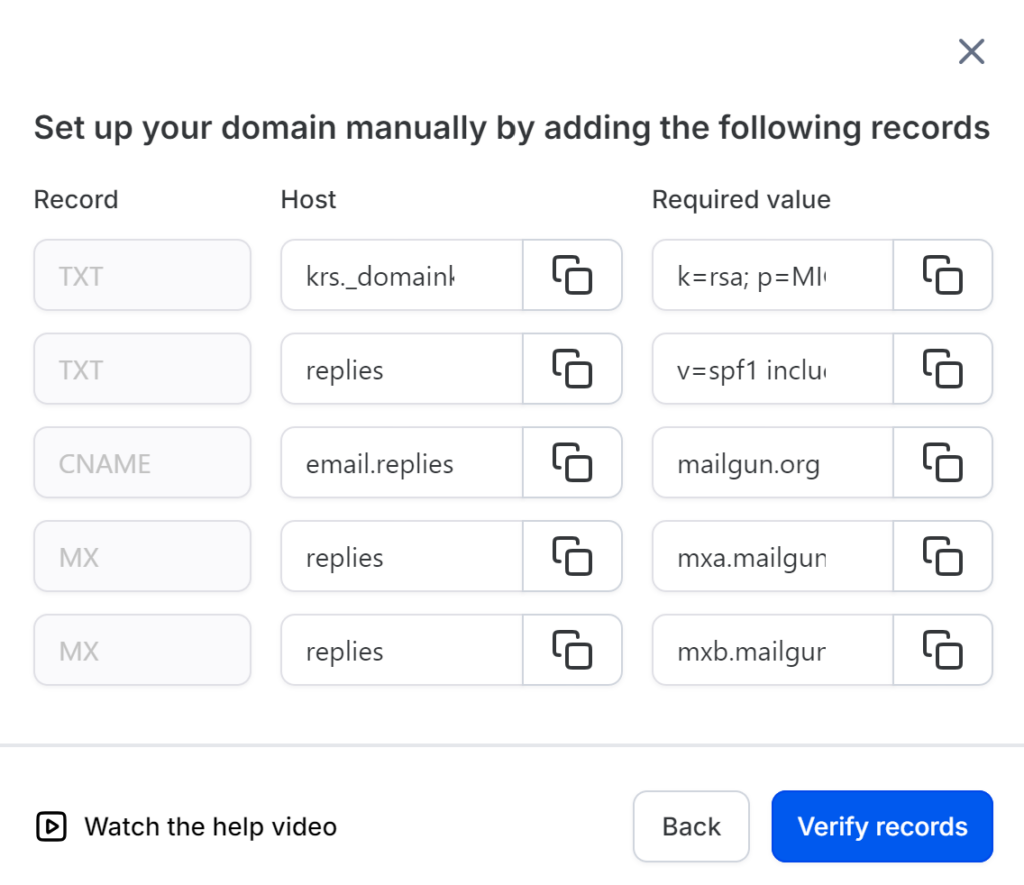
In your DNS settings, you’ll add a new record for each row shown in this box.
Here’s a list of help docs for the most common platforms, including Cloudflare:
- GoDaddy
- Google Domains
- Hostgator
- Hover
- Namecheap
- Squarespace
- AWS
- Cloudflare
- Bluehost
- Hostinger
- InMotionHostwinds
The type of DNS record you’ll be adding is in the far left column of the table shown in your Fern CRM settings, the text needed for each record is in the “Host” and “Value” columns.
For example, the first record you want to add to your DNS records is a TXT record:

In your DNS settings, find a button or link that says something like “Add Record” and then choose TXT as the type of record you want to add.
Next, click the 2 overlapping squares icon next to the entry in the Host column for the record you’re adding. In this example, it starts with “smtp” and continues out of sight.
Go back to your DNS records tool and paste that text into the DNS record you’re creating.
Repeat the process to copy and paste the “Value” text into the “Value” box in that same DNS record (it’s called “Content” in Cloudflare).
Before you save it ~ Cloudflare requires the Content of every TXT record to be inside quote marks (but not other types of records.) So add a quote mark at the beginning and end of the Required Value/Content only. (Step 5 and 6 below show exactly what I mean if you want to see an example first.)
Hit save on the new DNS record and move onto the next row.
When you’re done adding all the records shown in your Fern CRM settings, click the blue “Verify records” button in the Fern CRM window.
It can take up to 24 hours for the verification process to complete, but it’s usually done within 1-5 minutes.
While you wait, let’s add one more absolutely necessary record (now that you’re comfy with the process!)
Step 5 ~ Add A DMARC Record
Go to your DNS dashboard and click the button/link to add a new record.
Choose TXT for the type of record you want to create.
In the Name/Host field enter this exact phrase, but replace [your subdomain] with the actual subdomain phrase you just used as your dedicated sending domain:
_dmarc.[your subdomain]
So if your email subdomain is:
hello
then you want to enter:
_dmarc.hello
In the content field, add this exact text ~ including the quote marks ~ but replace [your email address] with an email address outside of Fern CRM:
“v=DMARC1; p=reject; pct=100; rua=mailto:[your email address]; ruf=mailto:[your email address]; fo=1;”
An automated system will send data reports to that email which you can mostly ignore, but you’ll want to keep them for troubleshooting if a need ever arises. Gmail is great for this because you can set up a filter to automatically open the reports that will be sent to this address and archive them in a specific folder/label.
Click to save the record and that’s it. You don’t need to verify it anywhere.
[Optional] Step 6: Add Your Logo For Inbox Visibility
We’re all about creating delightful customer experiences and helping your brand stand out from the noise, so of course we want to show you how to get your logo or gorgeous face to show up in every inbox next to your subject line!
Not every inbox service will honor this and display your image. But hey, it’s still worth asking them too!
Start by adding one more TXT record.
In the name field, you’ll add this exact phrase:
default._bimi
And in the Content/Value field, add the following text but replace [your image URL] with the actual link to where your image is hosted:
“v=BIMI1;l=[your image URL];”
For example, it might look like this when you’re done:
“v=BIMI1;l=https://storage.googleapis.com/media/fernlogo.svg;”
(You can upload the image to your Fern CRM media library and then grab the link to it for this.
Save your TXT record and you’re done! No need to verify anything and it’s ready to go when the records from Step 4 are verified.
Further Reading & Resources
For more info about how to set up more complex versions of your dedicated email sending domain and answers to some FAQ, check out this help doc by LeadConnector (the tool that’s built into Fern CRM to make these connections and verify the records.)
When your business is growing and you’re ready to start using a dedicated IP, contact us and we’ll set that up for you. You can learn more about that here:
https://help.leadconnectorhq.com/support/solutions/articles/155000001160