How can we help?
Formatting: How To Indent A Paragraph
Depending on the kinds of content you publish, you may want to add an indent to the beginning of some (or all) of your paragraphs.
And simply clicking the Tab button does something completely different on most web-based tools, so that doesn’t work! (Pressing the Tab button is an accessibility feature that (usually) moves your cursor to the next thing on a page.
Then you find out that adding 5 spaces with the spacebar looks good at first, but doesn’t stick when you preview or publish the page.
How annoying! 🤬
In this Help Doc, I’ll show you how to create paragraph indents on your web pages, funnel pages, forms, surveys, and anywhere else you can add CSS code.
So, keep reading if you want to take your paragraphs from this:

to this:

The steps here show you how to do it in the page builder (funnel pages or website pages), but if you know how to use CSS in forms and other features, it works the same there too.
If you need help converting the steps on this page to work in a different feature, come to Office Hours and we’ll help you get it done in 5-10 minutes.
The text in the above screenshots is from “The Hill We Climb” by Amanda Gorman. She read it at the 2021 U.S. Presidential inauguration. Click here to read the rest of the poem and/or visit her website to purchase a copy or learn more about her: https://www.theamandagorman.com/
Option 1 ~ Indent EVERY Paragraph
Use this option if you want every single paragraph element on the page to be indented.
This means any line of code that starts and ends with the “p” bracket like this:
<p>Your text</p>If you want to pick and choose which blocks of text are indented, use Option 2 below.
Go to the page/form/thing where you edit the text and open the Custom CSS settings. If you’re in the page builder (funnels or websites) it’s the paintbrush icon that’s to the left of the “T” in the row of icons across the top of the page:

Click on the paintbrush and you’ll see a popup window that looks something like this:

If any custom CSS code has been added to the page before this, this window might already have many rows of code. If not, then the box will be empty and only row 1 will be numbered.
If there’s already code there, place your cursor at the very beginning of the code (in the screenshot above, this would mean placing your cursor before the “p”) and hit enter once or twice to create some space at the top.
Next, copy the following code and paste it in row 1, just like you see in the screenshot above:
p {
    text-indent: 5%;
}
When you’re done, click the “Save” button in the bottom right corner of the CSS window to return to the page builder.
If you’re not happy with the size of the indentation, follow the steps below (“Changing the size of the indent” section) to change the size.
Option 2 ~ Only Indent Paragraphs In Specific Text Blocks
If you want more control over which paragraphs are indented and which aren’t, then you’ll follow the same steps as above with two small changes: we’re going to change the “p” at the beginning of the CSS code and we’re going to label which text elements we want to indent.
The CSS Code
Follow the steps in Option 1 to open the Custom CSS editing window, make room at the top if needed, and add this code to row 1:
.indent {
    text-indent: 5%;
}
Make sure to include the period before the word indent, it’s not a typo! (There’s no period in front of the “p” in Option 1, which is also intentional and not a typo.)
When you’re done, it should look like this:

When you’re done, click the “Save” button in the bottom right corner of the CSS window to return to the page builder.
Label The Elements To Indent
Now, find the text blocks you want to indent. It can be a heading element, paragraph element, or any other element that contains text.
Click on the element with the text you want to indent so that it shows the settings for that element. For example, here’s a text element that’s been selected (you can tell because it’s outlined in orange, even when the cursor isn’t hovering over it) and you can see the settings on the right side:
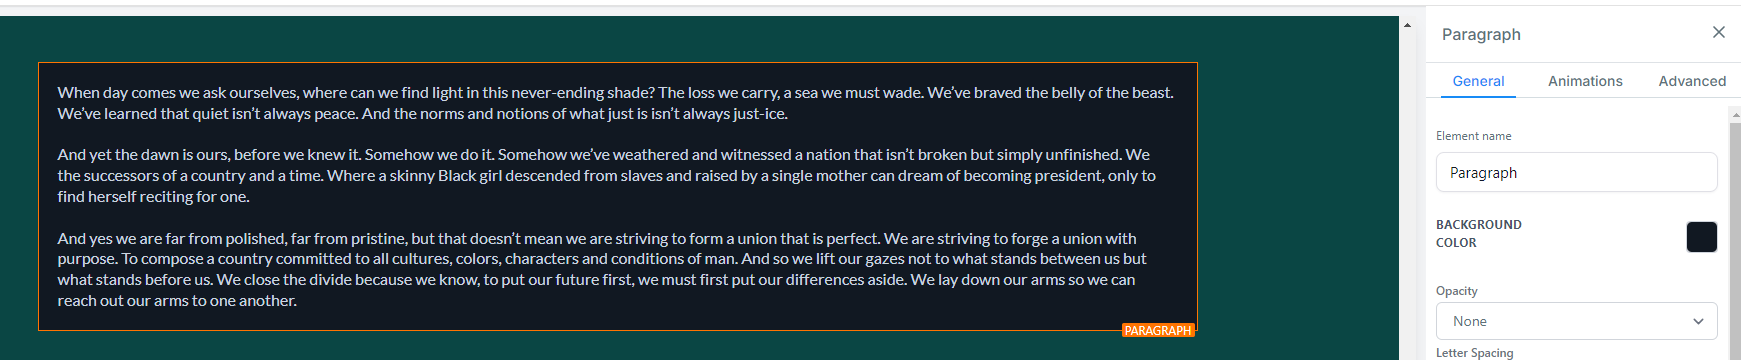
In the Settings sidebar, there are 3 tabs across the top: General, Animations, and Advanced. Click on “Advanced” to open more settings.
Find the field labeled “Custom Class” and click on the box with placeholder text that says, “Enter class name”.
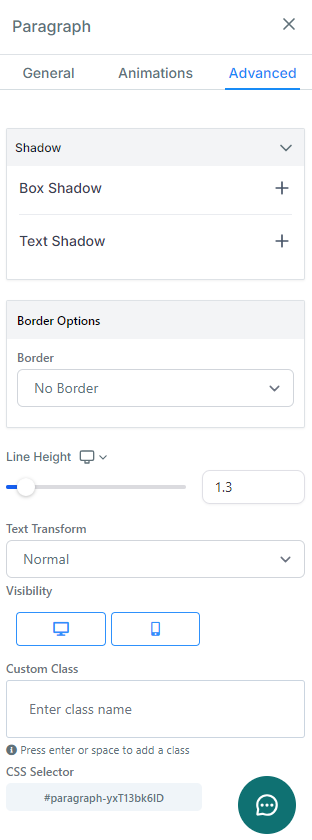
In that box, enter the following text without punctuation:
indent
And click enter or the spacebar to make it “stick.”
When you’re done, it will look something like this:
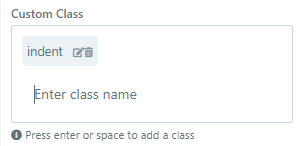
(Yep, the period before the word is intentionally left out when adding it to the Custom Class box.)
Now when you look at the text you wanted to indent, it should be indented:

Add the “indent” to the “Custom Class” box for every text element you want it to indent. It will indent every paragraph in that element, so if you want some to be indented and not others, simply split them into separate elements and add the Custom Class to the ones you want to indent. The ones without the “indent” Custom Class will not be indented.
Don’t forget to hit the “Save” button in the top right of the page builder to save your work and hit “Publish” when you’re ready for your changes to go live on the page that visitors see.
If you’re not happy with the size of the indentation, follow the steps below to change the size.
Changing the size of the indent
You can change the 5% to any percentage you prefer and you can also change it to “px” or “em” instead. (If you don’t know what px or em are, just stick with percentage.)
Whatever you change it to, make sure to keep the semicolon after the percent/px/em.
For example, you can change 5% to:
50px;
2em;
8%;
Or whatever you like.
If you change it to 50px, it will look like this:
p {
    text-indent: 50px;
}
FAQ
Question: Do I have to add the CSS code to each page of the funnel or is there a way around that?
Answer:
At this time, there’s no global CSS settings option for funnels or websites, so you’ll have to add the CSS code to each page you want it on.
If you’re adding it to courses, communities, or anything in the Client Portal, you can add it to the Custom CSS Settings in the Client Portal settings and it will work on every page in there.
I’ll update this page if we get funnel-wide or site-wide CSS settings in the future!
Questions? Problems? Rants? Raves?
Leave a comment below or post ’em in the Fern Brain Trust community so we can help!
Thanks for this. Just a follow up question. Do I have to add the CSS code to each page of the funnel or is there a way around that?
At this time, there’s no global CSS settings option for funnels or websites, so you’ll have to add the CSS code to each page you want it on.
If you’re adding it to courses, communities, or anything in the Client Portal, you can add it to the Custom CSS Settings in the Client Portal settings and it will work on every page in there.
I’ll update this page if we get funnel-wide or site-wide CSS settings in the future!