How can we help?
How To Fix A Bounced Email In Contact Profile
It happens to every business eventually. An email bounces and, if your Fern CRM system is setup correctly, the contact is tagged, DND is enabled, and someone on your team is notified to look into it.
If you don’t already have that set up, get the done-for-you template from us! (Template includes the Bounced Email Workflow that enables DND, adds the Bounced Email tag, and notifies you so you can look into it. It’s part of the Unsubscribe Best Practices CRM Template.)
When this happens, there’s a few things you need to do to fix the bounced email. And you might notice that the email still shows as “invalid” in the contact’s profile (maybe that’s what brought you here today.)
This troubleshooting article also shows you how to simply edit the email fields on a Contact’s info page.
You’re in the right place, so let’s cover all the steps:
Step 1 ~ talk to your contact
The first thing you need to do is alert your contact that their email wasn’t working and see if there’s a known problem on their end. Usually they’ll say they missed a payment or had an outage and it’s all good now. Sometimes they’ll give you a new email to add to your CRM.
Whether it’s a new email or the same old one, proceed once you’ve got that sorted.
Step 2 ~ update their email
Whether they give you a new email or say you’re clear to use the old one, open their contact profile, delete the old email from their info, enter the new one, and Save. (Even if you’re not changing the email to anything new.)
This clear’s the CRM’s memory of having an “invalid” email associated with this person.
To easiest way to edit the email is simply click into the email box, delete the current email, and hit the Save button at the bottom of that column:
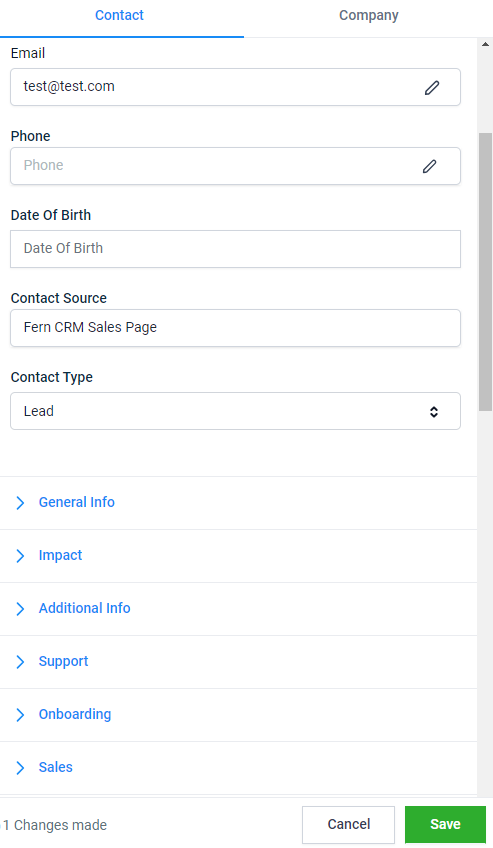
Next, enter the new email (even if it’s the same one) and hit the Save button again.
There’s also another way to edit things, which you may find useful at times. If you click the pencil icon that’s on the right side of an editable field (for example email or phone fields), it will open a popup window like this:
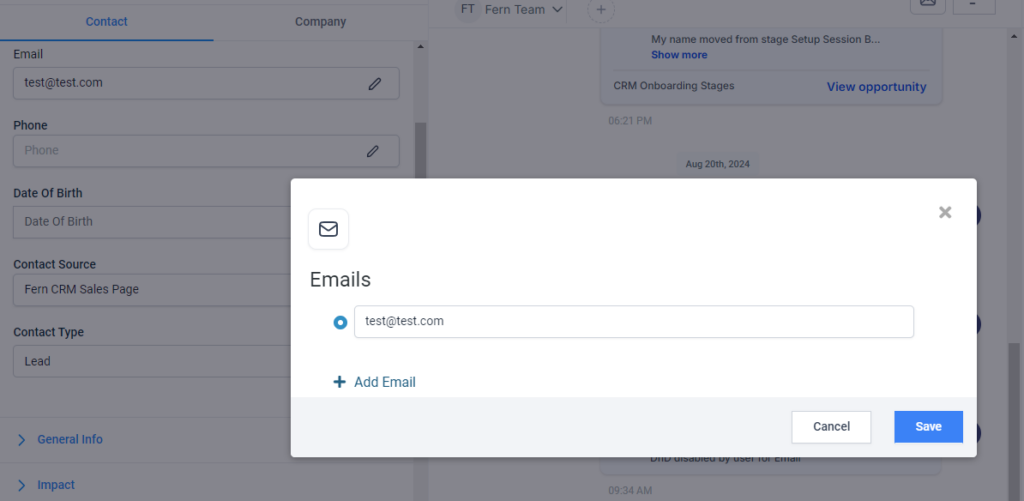
You can edit the current email in the editable field and/or add another email using the “Add Email” link. When you’re done, hit the Save button to save your changes or the Cancel button to exit without saving.
Step 3 ~ clear all the red flags
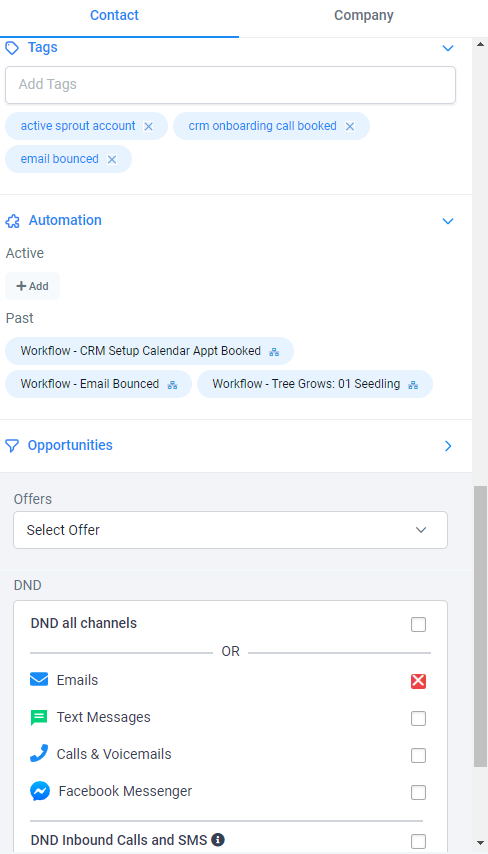
Now that they have a working email in their profile, make sure to delete all the red flags on their account.
If you’re using our CRM template, this means deleting the “email bounced” tag: click the X on the tag right there in the same column as their contact info.
And turning off DND: uncheck the box for Email DND in the same column as their info and tags:
Once that’s done, you should have no problem sending them emails again.
Step 4 ~ resend the email
If the email that originally bounced is still relevant to them, go ahead and click the blue “Resend” link next to the red triangle to resend it:

That’s it! Your contact is all clear and should receive all future emails without issue.